See also: Crafting for a full recipe list.
Windmill[]

![]()
![]()
![]()
![]()
![]()
![]()
![]()
![]()
![]()
![]()
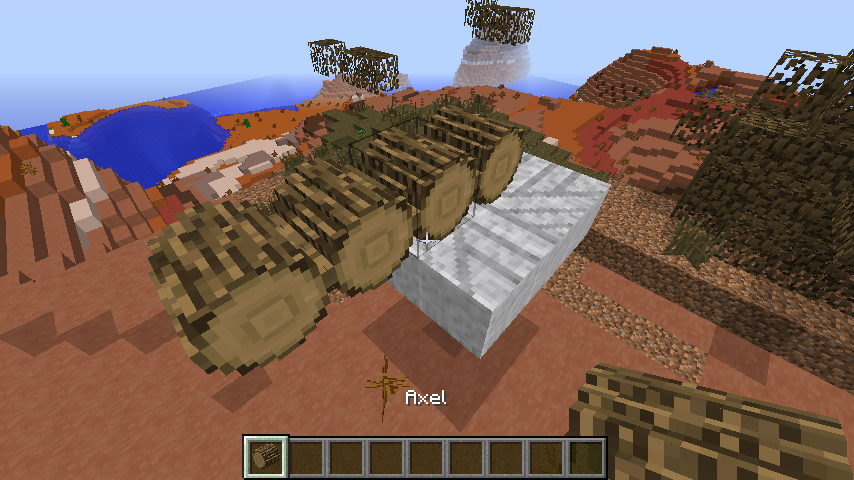
The windmill and millstone is a very low tech grinding device. Making one only requires a few logs,wool, and some smooth stone.
Start by placing down the millstone blocks in a 3x3 in any place that is convenient. It is recommended that it be placed 3 blocks above the floor for ease of adding additional industry later, but only 1 is required. You will also want a large area that will be open to the sky nearby and some room above it, again for additional industry. With 3 blocks of space below the mill, you can fit a hopper, sifter, and another hopper, inputting to the side of a chest underneath the millstone and still be able to insert items into the mill easily. With 3 blocks of space above, there will be room to place input hoppers and rail lines and still be able to move around.
 →
→ 
The blocks will automatically convert when they detect the correct arrangement. You can place two millstones directly adjacent to each other, but the 3x3 grouping will break unless the outer-most blocks are placed last on both sides. Even so, it is recommended that there be two blocks of space, just to accommodate the space of the external portions.
![]()
![]()
![]()
![]()
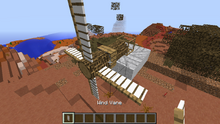
Next, place down four axle blocks in a row, starting at the center of the millstone. The first one will convert to a gear box and the third to a block with a "seal" that fills the space around the semi-roundness of the axle with the wall (not shown). Be aware that the axle must be placed no more than 4 blocks below sea level for the dimension it is in (for the overworld this is Y 60) or it will be considered underground and not in a location to receive any wind. You will want to point it in a direction that will remain largely free of obstacles, as discussed below.

![]()
![]()
![]()
![]()
![]()
![]()
![]()
Lastly, place the wind vanes. You will need two for each side. Unless Harder Wildlife is installed, this will likely be the most expensive portion, requiring 12 wool. It might be easiest to save up enough iron for a pair of sheers before construction if enough sheep cannot be found. Harder Wildlife will make this easier in two respects, firstly by increasing the amount of wool dropped by a killed sheep and secondly by adding goats to the Mesa biomes, so that sheep are slightly easier to locate.

Now fully built, the windmill will supply power to the millstone allowing it to grind items into dusts.
You will need to insert items into the mill by right-clicking with a stack on the four edge blocks (inserting one item at a time), or by using a hopper or other item transport system (again, on any of the available edge blocks). The mill will drop its output below the center block into the world (if possible) when either it has no remaining input material to process, or the contained stack is of size 8 or greater. A hopper can also extract the items out from the center block as soon as they are available.

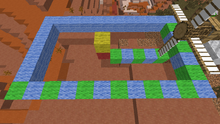
Lastly, you need to have an empty area around the wind vanes, so they can catch the wind. The area checked is 5 blocks wide and 10 blocks long and is checked at the level of the lowest point of the vanes. Using the image on the left, the red wool is blocking the windmill's airflow directly (fully blocking light at that location due to being an opaque block). The yellow block would have a lower impact if the red wool was removed, as it is not directly at the checked location and is instead only casting a shadow. The blue and green wool are safe.
The area does not need to be completely clear: mechanically the calculation is done by checking the sun light value at these locations, as having sunlight indicates some level of sky access (nighttime has no effect). In the 5×10 area there needs to be an average light level of 13 or there won't be enough wind to power the millstone (650 total light or more). The better the sky access, the faster the mill will grind.


If WAILA is installed, the tooltip for the whole windmill structure (not the millstone) will show the current calculated airflow (from 0 to 750) and approximate time it will take to grind 1 item (in seconds). At 650 airflow and below, it will instead display "unable to grind."
Sluice[]
![]()
![]()
![]()
![]()
![]()
![]()
![]()
This section primarily deals with the default ("non-container") sluice. The container sluice is much simpler, requiring only that it be placed at the end of a water flow and have an open block for a downstream flow. It can store a lot of soil (several stacks), though the more it holds the less efficient it is, as well as dropping blocks in its output stream to be carried downstream to more sluices. For the container sluice, see this page.
For both versions, blocks that count as processable soil are sand and gravel. Gravel has a small chance of dropping ore nuggets instead of dust and has flint added to the drop list. Sand has a small chance of dropping two tiny dusts instead of 1.
Both sluices have comparable output rates, but the container sluice requires less micromanagement as it can be stuffed full of gravel and then left alone for a while, whereas the non-container sluice requires manual feeding or a hopper, but takes up less horizontal and vertical space.


Sifter[]
![]()
![]()
![]()
![]()
![]()
![]()
![]()
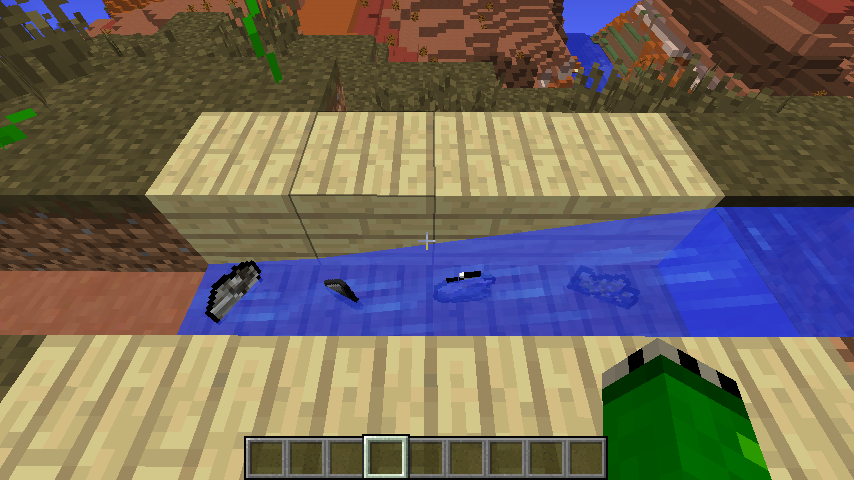
The Sifter automatically combines tiny piles of dust into large piles in an 8:1 ratio, which is slightly more efficient than hand-crafting 9:1. The sifter will collect any siftable items placed on top of it and add it to its inventory. Note that while the sifter has two input slots, it can only sift one stack at a time, so if the output slot is full, neither input will be processed until its cleared.

Early game this can be placed two blocks below the center of the millstone so that even without a hopper, it can collect and combine the millstone's products as they fall out. A hopper isn't ever necessary, but it does increase the total number of input slots available to the sifter so that it doesn't get full and jam up handling multiple item types. The sifter does not do any dust mixing, e.g. copper dust and tin dust producing bronze dust, even though the GUI looks like it does. It is simply a convenience for handling non-multiple of 8 milling products, such as wheat and sugar.
A hopper (or other item transport) is required to remove the items from the sifter. The sifter accepts inputs from the top and outputs on the bottom only.